Graveyard Spirits DIY Project

Suitable Candidates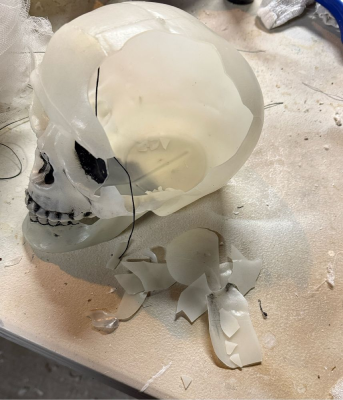 The original Graveyard Spirits were made with glow in the dark skulls several years ago. Sadly being outside for so long the plastic degraded and last year when I was putting them away the skulls crumbled in my hands. As such I decided to remake them. This time around I just got some plastic skulls of the "life size" variety, and painted them. The original Graveyard Spirits were made with glow in the dark skulls several years ago. Sadly being outside for so long the plastic degraded and last year when I was putting them away the skulls crumbled in my hands. As such I decided to remake them. This time around I just got some plastic skulls of the "life size" variety, and painted them.
|
 There are a lot of options for painting. You can just get some glow in the dark spray paint and do several coats of that or you can do something more elaborate like I did. My new spirits were painted with white plastic friendly spray paint then painted with Optical White Wildfire paint mixed with some blue glow in the dark pigment powder.
 After doing the base paint whether it's a simple GITD spray or something more elaborate you need to get some matte black acrylic paint and use that on the eyes, nose, between the teeth, and to do some shading. How far you go is up to you but this makes a huge difference in how striking the final prop is so Don't skip this step! I use Black 3.0 from Culture Hustle for these spirits. The originals used Black 2.0. That's a pretty high end solution as it's touted as the closest line of blacks you can get to vanta black, but for me it's worth it and the black paint outlived the plastic skulls it was painted on. Even if you use cheaper stuff this really is critical for the final look.
|
Another Hole in Your Head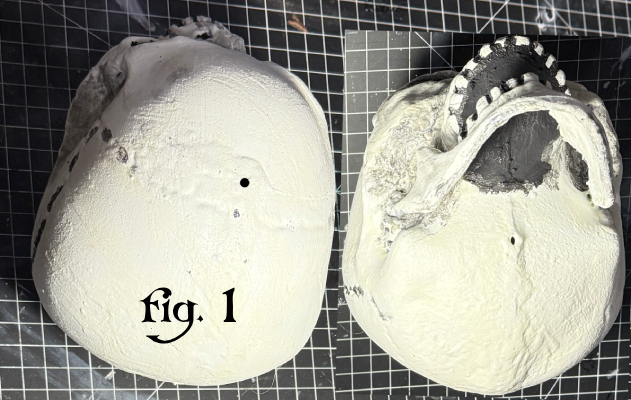 Most skulls that I’ve seen actually already had a little bottom hole which is positioned pretty well. If not look where the jaw hinge is and go to the bottom of the skull in the center lining up with the jaw hinges and mark where you need a hole. Then look on the very top of the skull halfway between the two sides also lining up with the jaw hinge and that's where you want the top hole. Mark these spots if the holes aren't already there. (figure 1) Most skulls that I’ve seen actually already had a little bottom hole which is positioned pretty well. If not look where the jaw hinge is and go to the bottom of the skull in the center lining up with the jaw hinges and mark where you need a hole. Then look on the very top of the skull halfway between the two sides also lining up with the jaw hinge and that's where you want the top hole. Mark these spots if the holes aren't already there. (figure 1)Depending on the skull that you have and how thick the plastic is you may want to make a starter hole with either a Dremel or a pin vise. I usually just wing it and poke it through myself. If you do drill a hole, make sure that it’s not too big you want to just barely accommodate the needle otherwise it can suck the fabric into the top of the skull awkwardly when you are tying it off.
|
Soft Bits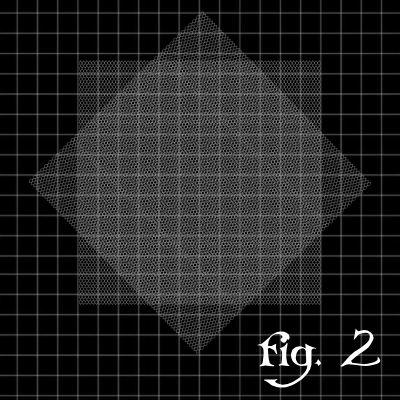 The first thing you wanna do when you get your tulle is make sure that it glows nicely in blacklight. I have found that pretty much all cheap white tulle does but you want to be certain before you commit. It comes in various widths from basically a ribbon to very wide. Here I am using 56 inch width tulle. The first thing you wanna do when you get your tulle is make sure that it glows nicely in blacklight. I have found that pretty much all cheap white tulle does but you want to be certain before you commit. It comes in various widths from basically a ribbon to very wide. Here I am using 56 inch width tulle.You want to cut your veil pieces which are the ones that are gonna go on the top of the skull my tulle is 56 inches wide and so I’m doing roughly a 56 x 56 square there is absolutely no reason to be precious about cutting your tulle here because you’re going to be tattering it anyway. Because of this I measure it roughly then bunch it up and hack it off. A rough edge will only enhance the final look. I only do 2 layers for the veil because I want to be able to still see detail on the skull underneath. Once your two veil pieces are cut lay them down and put one at a 45° (figure 2) angle on top of the other so that they’re staggered then grab roughly in the centre. Again, no need to be precious about it, being in the exact center is not required. Where you pinch it is where you are going to start sewing this together.
|
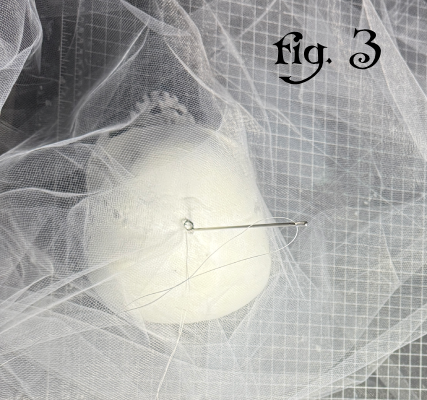 One of the things you need to have for this project is a long upholstery needle. I have one that is 12 inches long and has served me very well over the years not just for projects like this but also for sewing through props to help anchor them or hang them from trees. The needle needs to be able to go through the skull from the top to the bottom and vice versa with enough room for you to grab it without hurting yourself, but I love my work horse of a huge needle. You can also use stiff wire but the needle is much easier to manage and is a great tool to have anyway. One of the things you need to have for this project is a long upholstery needle. I have one that is 12 inches long and has served me very well over the years not just for projects like this but also for sewing through props to help anchor them or hang them from trees. The needle needs to be able to go through the skull from the top to the bottom and vice versa with enough room for you to grab it without hurting yourself, but I love my work horse of a huge needle. You can also use stiff wire but the needle is much easier to manage and is a great tool to have anyway.Thread the big needle with white upholstry thread for strength. From the centrepoint that you pinch on your veil. I tie a little black ring like a soldered closed jump ring something at the very end of the thread to anchor the stitch down which will also keep it from getting sucked down into the top hole of the scalp. The ring is also great for hanging the finished prop from. I use black because I hang these with black 20 pound or higher fishing line. Now possibly the most frustrating part of this you have to get the needle that’s coming in from the top to all the way through to the hole in the bottom it can take several tries could be very fiddly, this is the part that is going to have you swearing. I find if I put my finger over the hole at the bottom and very very carefully aim the needle down towards my finger I get it through the hole first time pretty much every time, but I do a lot of stuff like this and you will have to be careful not to skewer yourself if you use this method.
|
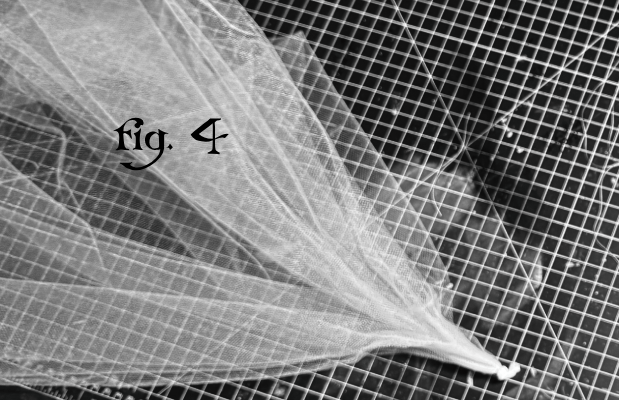 Next you want to cut the tail piece which is the piece on the bottom of the skull. How long you want this and how fat you want it is completely up to you. I tend to cut it about half the size of the veil pieces, but you could make it longer if you want or shorter as it’s going to get a lot longer when you tatter and pull on it. Again, no need to be precious about cutting this. Pinch it sort of centerish then tie a knot where you pinched it. This will keep the tulle from getting sucked up into the hole in the skull (figure 4). Next you want to cut the tail piece which is the piece on the bottom of the skull. How long you want this and how fat you want it is completely up to you. I tend to cut it about half the size of the veil pieces, but you could make it longer if you want or shorter as it’s going to get a lot longer when you tatter and pull on it. Again, no need to be precious about cutting this. Pinch it sort of centerish then tie a knot where you pinched it. This will keep the tulle from getting sucked up into the hole in the skull (figure 4). Now, sew the tail to to the skull from where you brought the needle through the hole with a few passes through the knot in the tail. Keep the thread going through the skull tight but not strained so the black ring on top is against the skull with no slack. Now more of the fun part, go back up through the skull again to go through the top hole. If you just can't get it to go back through the top hole you can tie it off at the bottom but it won't be as strong. Either way, tie it securly.
|
In Shreds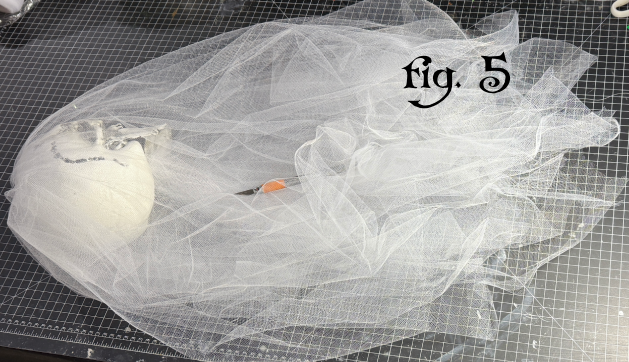 Once you have securely tied that off it and cut off any exccess thread it is time to tatter. You want to hold or hang the skull by the loop or ring and make sure that all of the veil and the tail are hanging the way you want. I just use a razor blade or an X-Acto knife, whatever you want to use works, just be careful. Don’t cut yourself. You don't want to have to wash blood out of white tulle. Once you have securely tied that off it and cut off any exccess thread it is time to tatter. You want to hold or hang the skull by the loop or ring and make sure that all of the veil and the tail are hanging the way you want. I just use a razor blade or an X-Acto knife, whatever you want to use works, just be careful. Don’t cut yourself. You don't want to have to wash blood out of white tulle. I start the tatters for both the veil and the tail a couple of inches beneath where the tail attaches to the skull (figure 5) because you don’t want it tattered over spirit’s face you want it to be solid there. As you tatter, pull on it and rip it a little. The idea is to make the very bottom part very wispy.
|
|
And that’s pretty much it! I find that these actually look better the more years they get used because the tulle just kind of gets more clumpy but stays ethereal looking which is what you’re wanting to go for.
|
Care & Feeding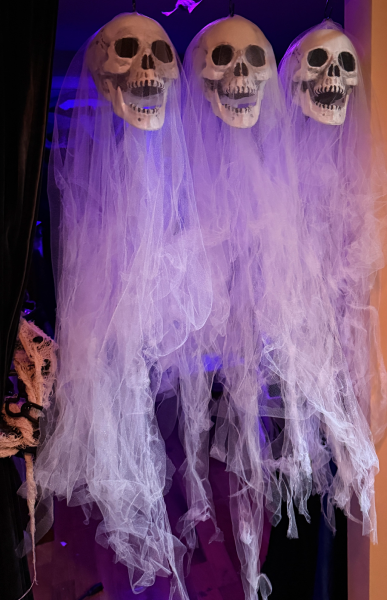 I have mine hanging outside for 2-3 months every year with a lot of traffic so they get a little grungy over time. I just wash them with a little clear soap in the shower and the tulle is almost like new. Other than that it's just picking any dead bugs out of the tulle and packing them away once they are completely dry at the end of every season.
|